

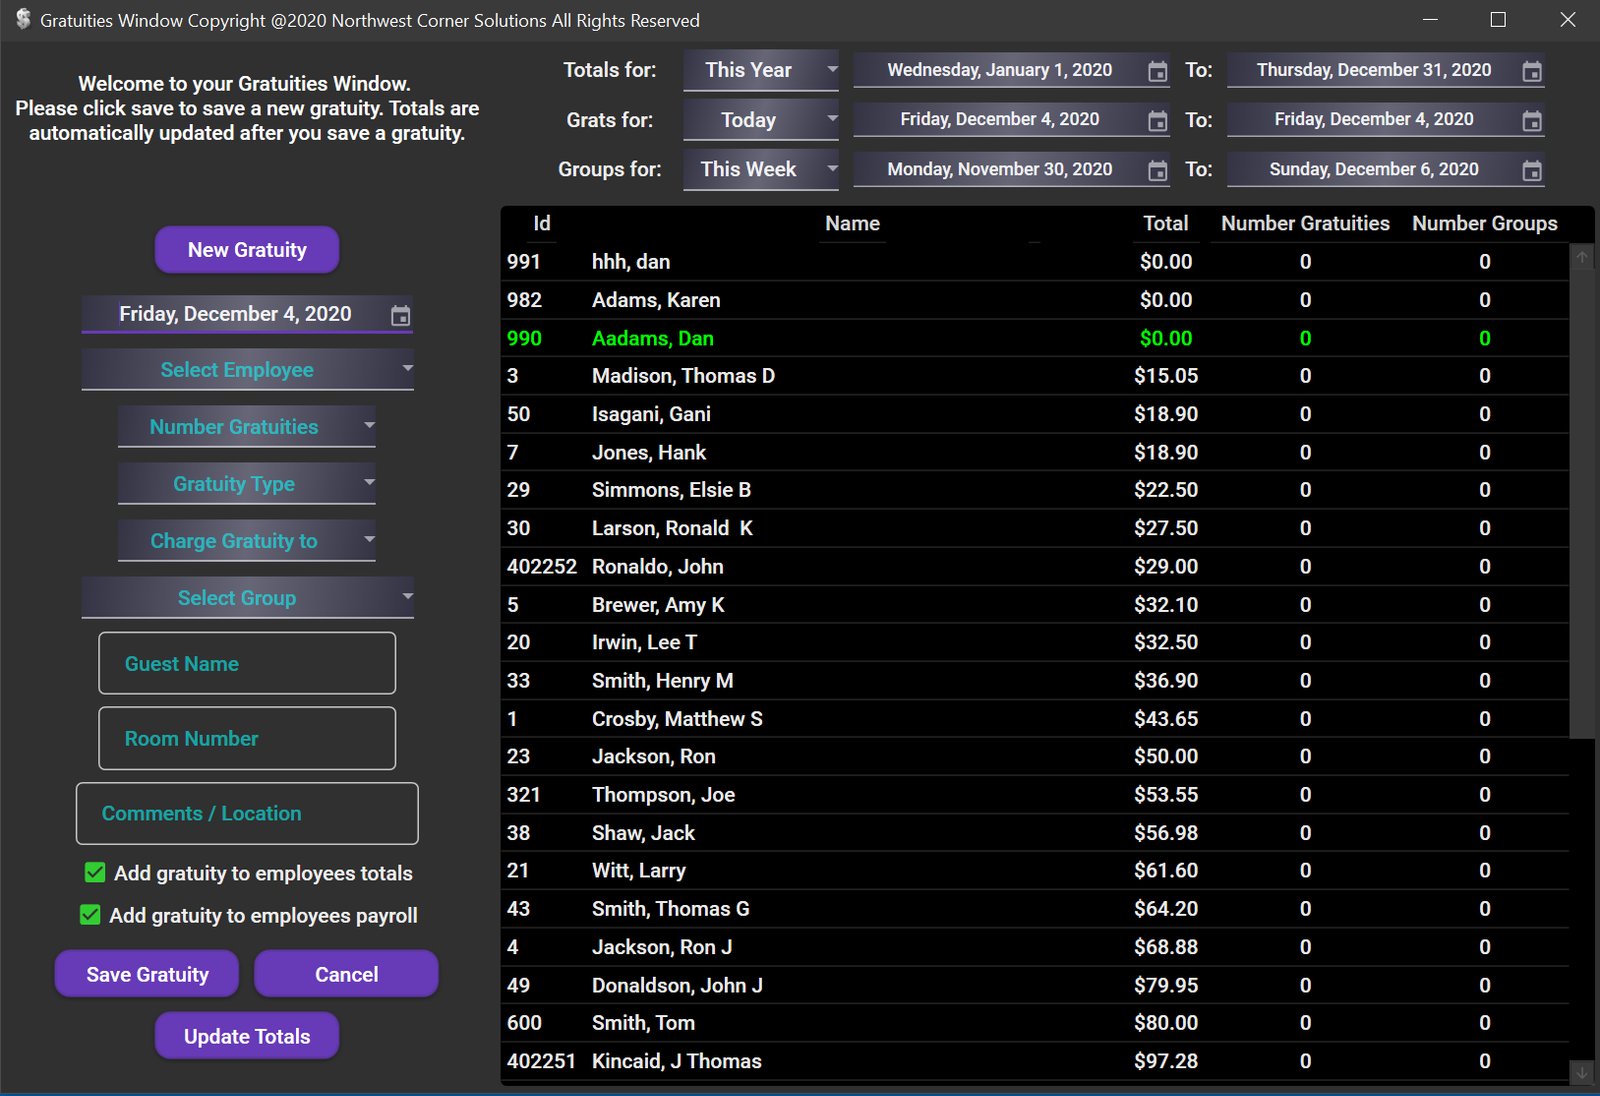
To enter a new gratuity for an employee, Click New Gratuity. You may now choose the employee for the gratuity by selecting the employee in the data grid or by using the combobox. Select the date for the gratuity, where the gratuity is to be charged and select the group the gratuity is charged to if it is being charged to a group. Now you may enter the guest name and the room or location for the gratuity, but these are not required. You must enter either a group or a guest to charge the gratuity to. Now select the gratuity rate (these rates are rates that were created in the Gratuity Rates window without the group gratuity check box checked). You may now enter any comments for the gratuity. If this gratuity is to be added to the employees totals or if it is to be added to the employees payroll report, please leave these boxes checked. The gratuities you enter on this window will be shown in the Gratuity Report.
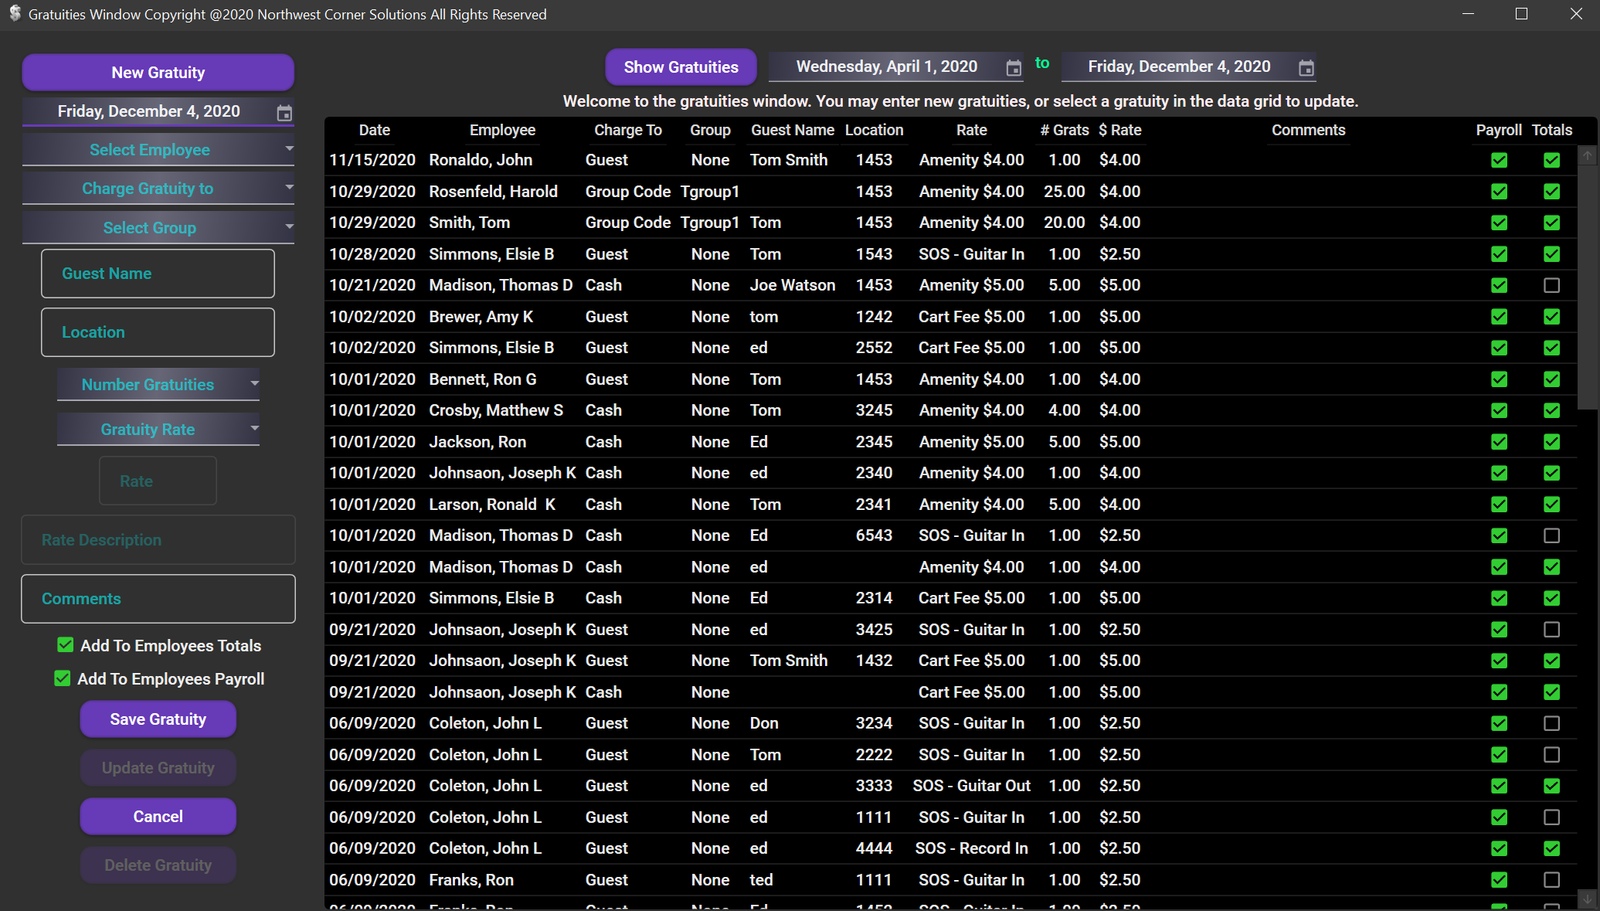
This window is used to manage all aspects of gratuities. You may enter new gratuities, change gratuities, or delete them. Entering gratuities is the same as above. To change or to delete a gratuity first select the date range for the gratuity and click Filter Gratuities. You may now select the gratuity in the data grid. You may chage the gratuity rate by selecting it in the combo box, or by changing the rate and description. Be sure to click Update Gratuity if you make changes to the gratuity.

This window is used to enter groups that you will be charging gratuities to in the Enter Gratuities window. For example, if you have a group that will have an amenity delivery, you would enter it here and then select it when you assign the delivery to an employee. You may enter new groups or make changes to groups already entered. You must enter a group code and a desctiption for each group.
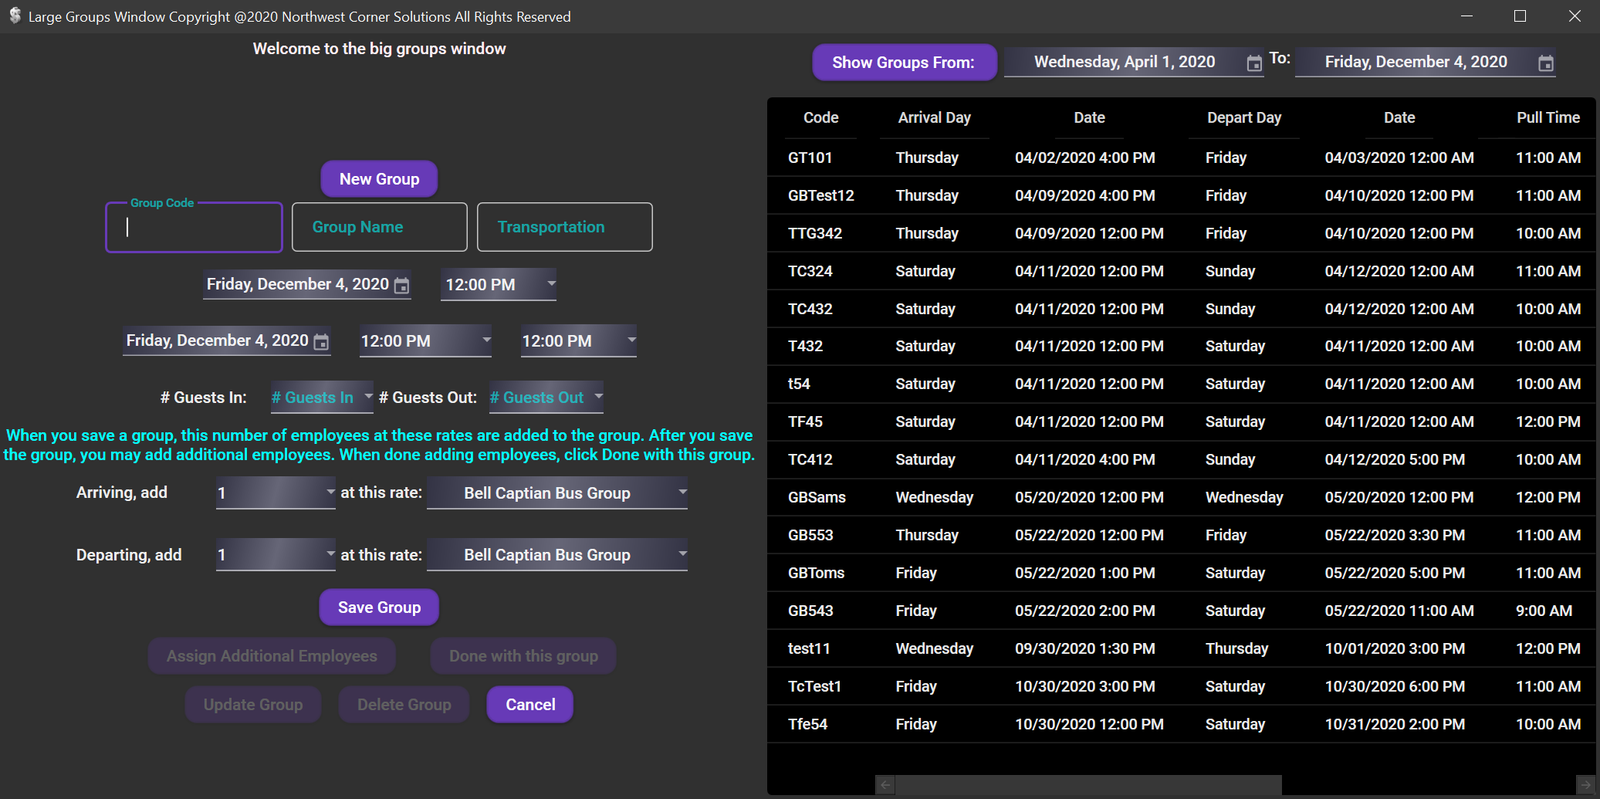
This window is where you will enter big groups that will have several employees assigned. As an example, let's say that you have a bus group coming in that will have 2 bell captains and 3 bell persons assigned to the arrival and the departure. You would enter a code for the group, the group name and the bus line name. Now enter the arrival and departure information, and the expected number of guests. To add employees to the group, enter the number of employees, and select the rate they will be paid at and click save group. To add additional employees to the group, you may now enter how many employees, and select the rate they will be paid at, and click Add Employees. When you are done adding employees, click Done with this group. To delete a group, or to make changes to a group, select it in the data grid. The groups you enter here will be shown on the Groups Report. The number of guests you enter for the group will be automatically split amongst the bell persons assigned to the group for each rate.
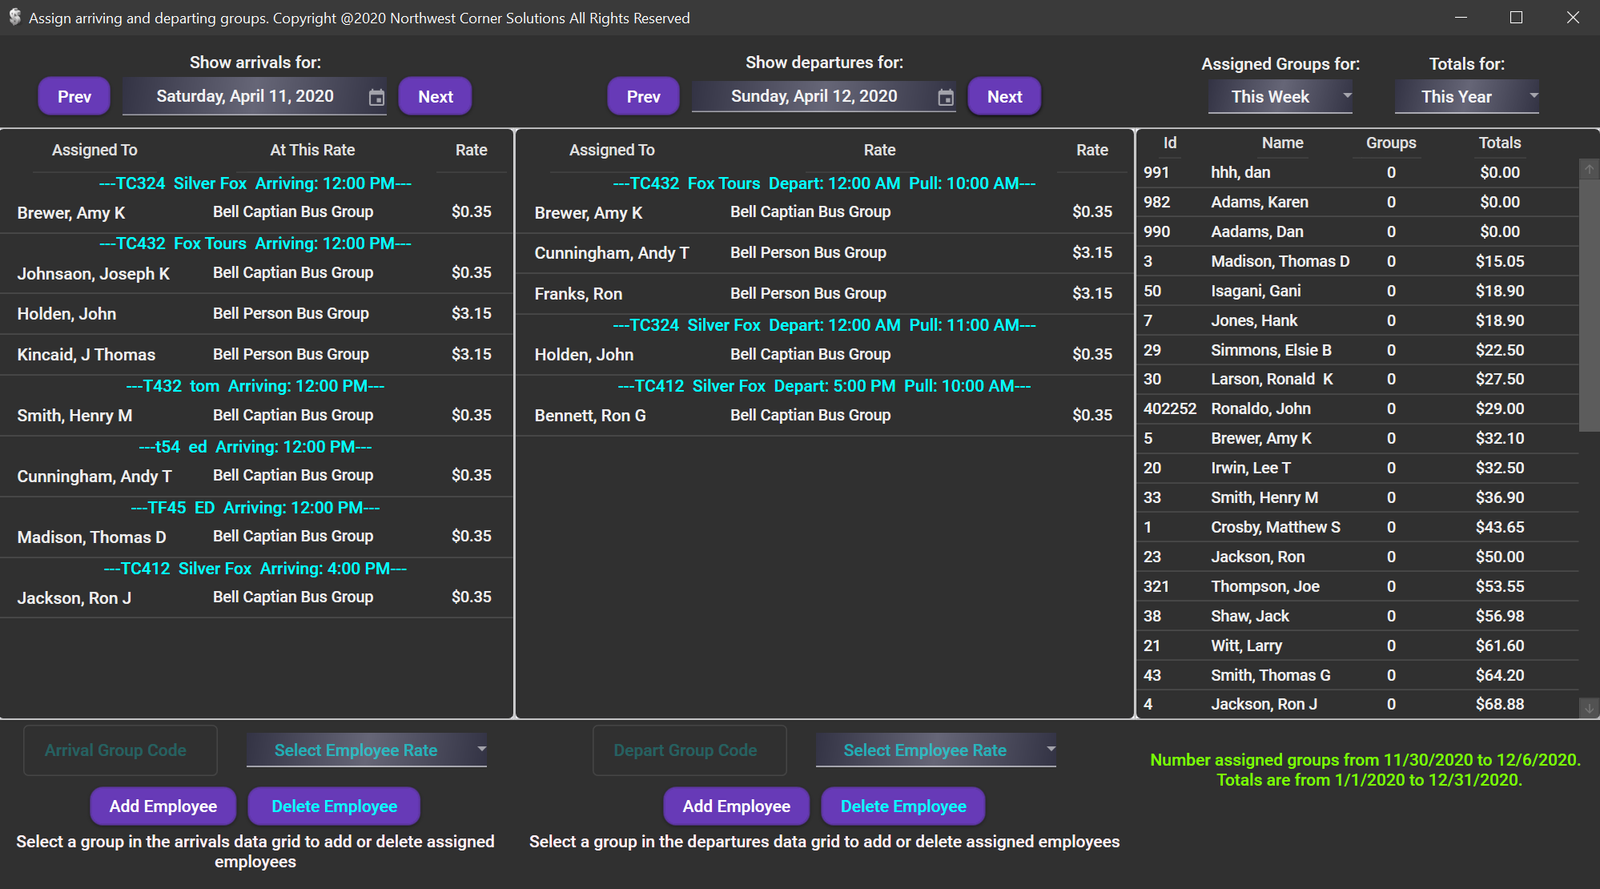
Now that we have entered a big group, and added employees, this is where we will assign employees to the group. On the right we have a data grid that displays each employee ranked from the lowest money total to the highest and how many groups they have been assigned for the selected time period. We can use this information as we assign employees to the group. On the left, we have a datagrid that displays all arriving groups for the selected date. These are the employees that you added when you entered the group. To assign an employee to a group, simply right click on any group and select the employee. The data grid on the right is automatically updated to reflect the assigned group. To reassign to a different employee, just right click again and select the new employee. To remove an employee from a group, select the employee in the datagrid and click Delete Employee on the bottom of the data grid. If you need to assign additional employees to the group, select the group in the datagrid and select the type of employee to add from the combo box below the data grid and click Add Employee. You may now assign an employee to the additional slot you just created. The gratuity rates listed on this window are the ones you created in the Gratuity Rates window with the Big Group Gratuity check box checked.
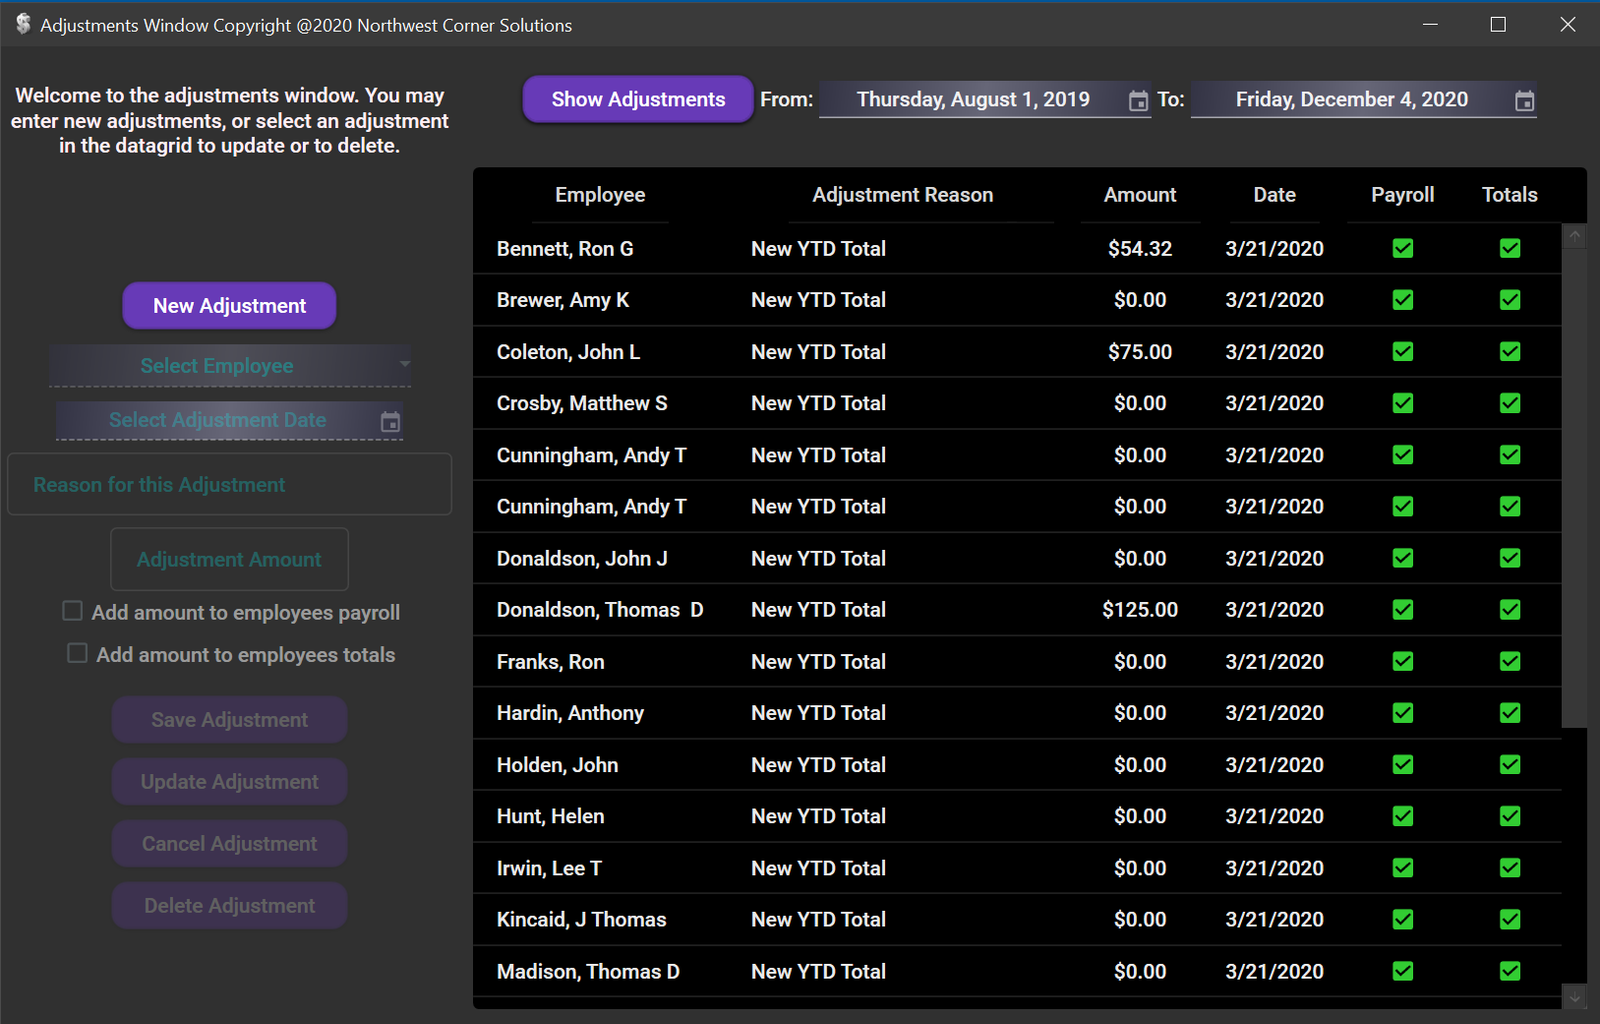
Mistakes happen! If you need to make chages to an employees totals, this is the window you will use. To enter a new adjustment, just click New Adjustment. Select the employee, add a reason for the adjustment, the money amount of the adjustment, and check whether the amount should be added to the employees totals or their payroll. Amounts that are added to the employees payroll will be shown on your Adjustments Report. As usual, to make changes or to delete an adjustment, select it in the data grid.
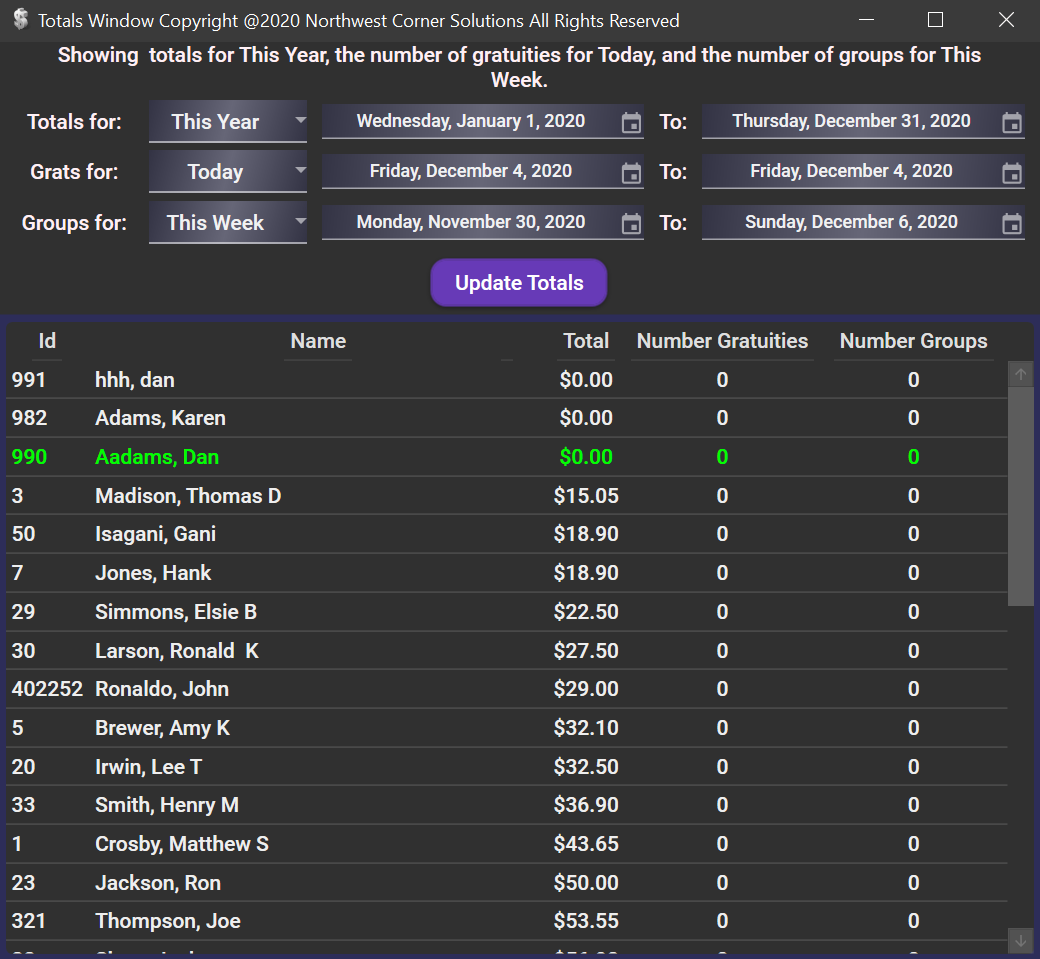
The idea behind this window is that when you need to assign a gratuity to an employee, it should go to the employee with the lowest amount of money earned so far. This window displays each employee listed from the lowest money total to the highest for the selected dates. We also have each employees number of assigned gratuities and the number of assigned big groups for the selected dates. If you have Bell Desk Insight installed, employees who are currently working are highlighted in green.