The first time you start Bell Desk Insight, you must enter the default user name and password. The user name is admin and the default password is also admin.
When I created the database for your copy of Bell Desk Insight, I include the default user name and password combination of admin / admin. Please change the password!
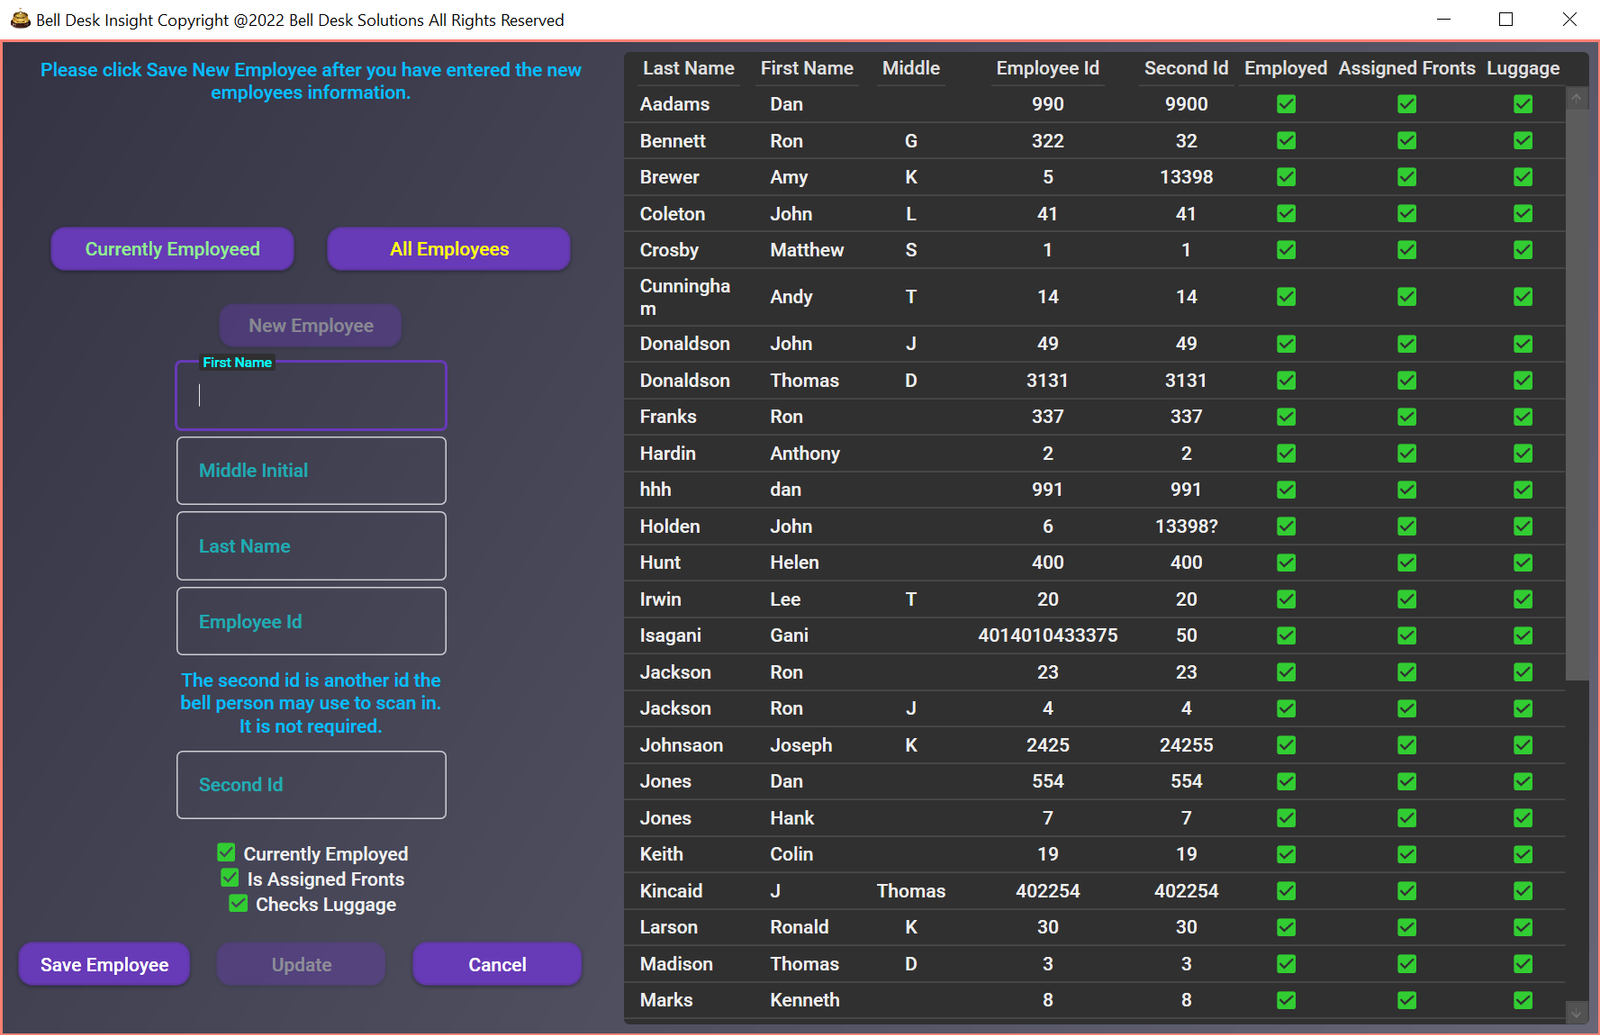
This is where you will input the information for your bell persons.
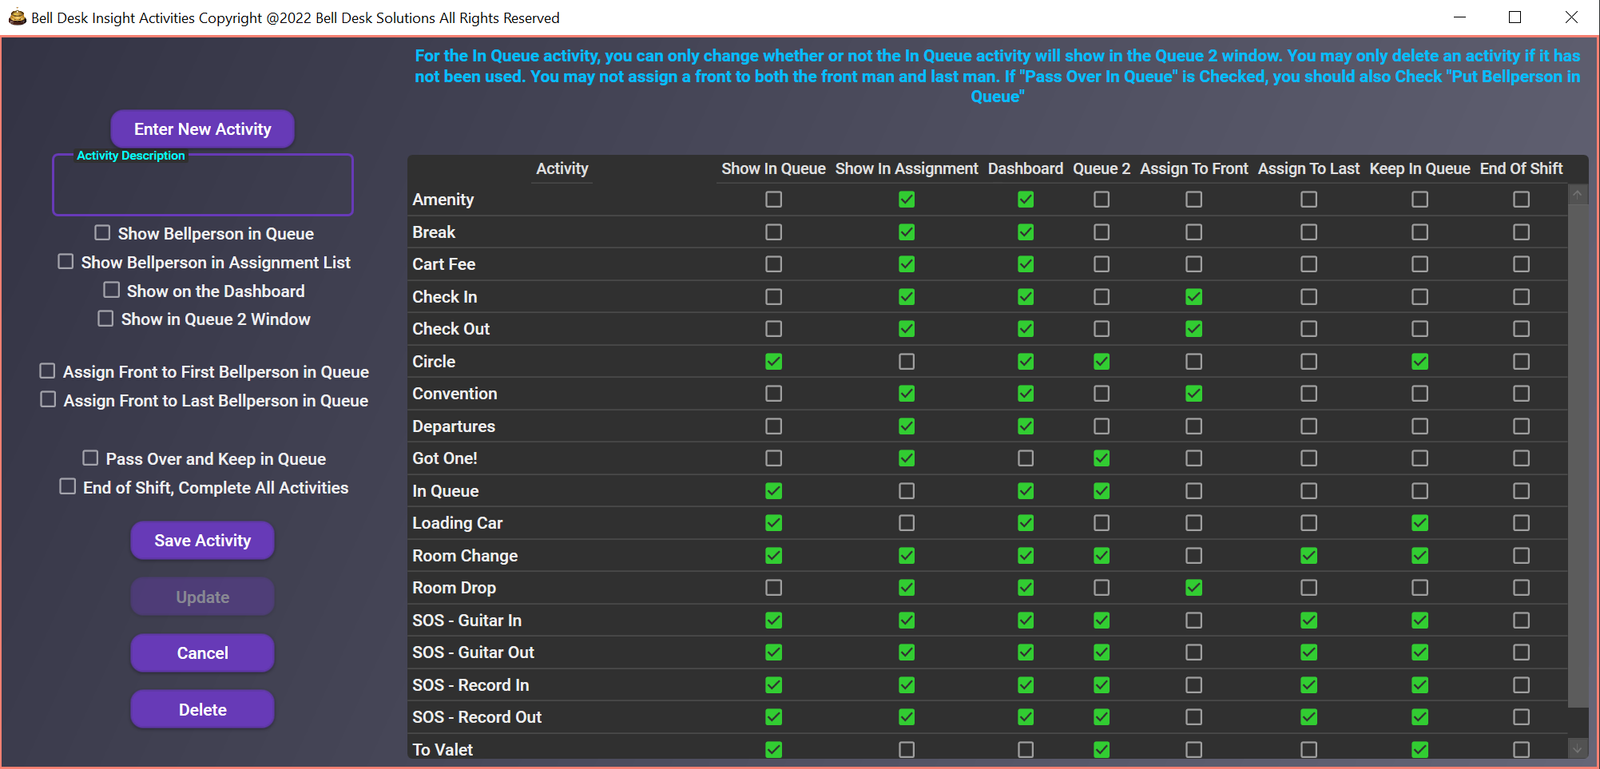
Bell Desk Insight activities provides the logic used to assign fronts and maintain the queue for the bell staff. This is where you will input each activity that your bell staff will engage in throughout the day. Please include everything your bell staff will be doing throughout their day.
The configuration window is where you will set the options for Bell Desk Insight.
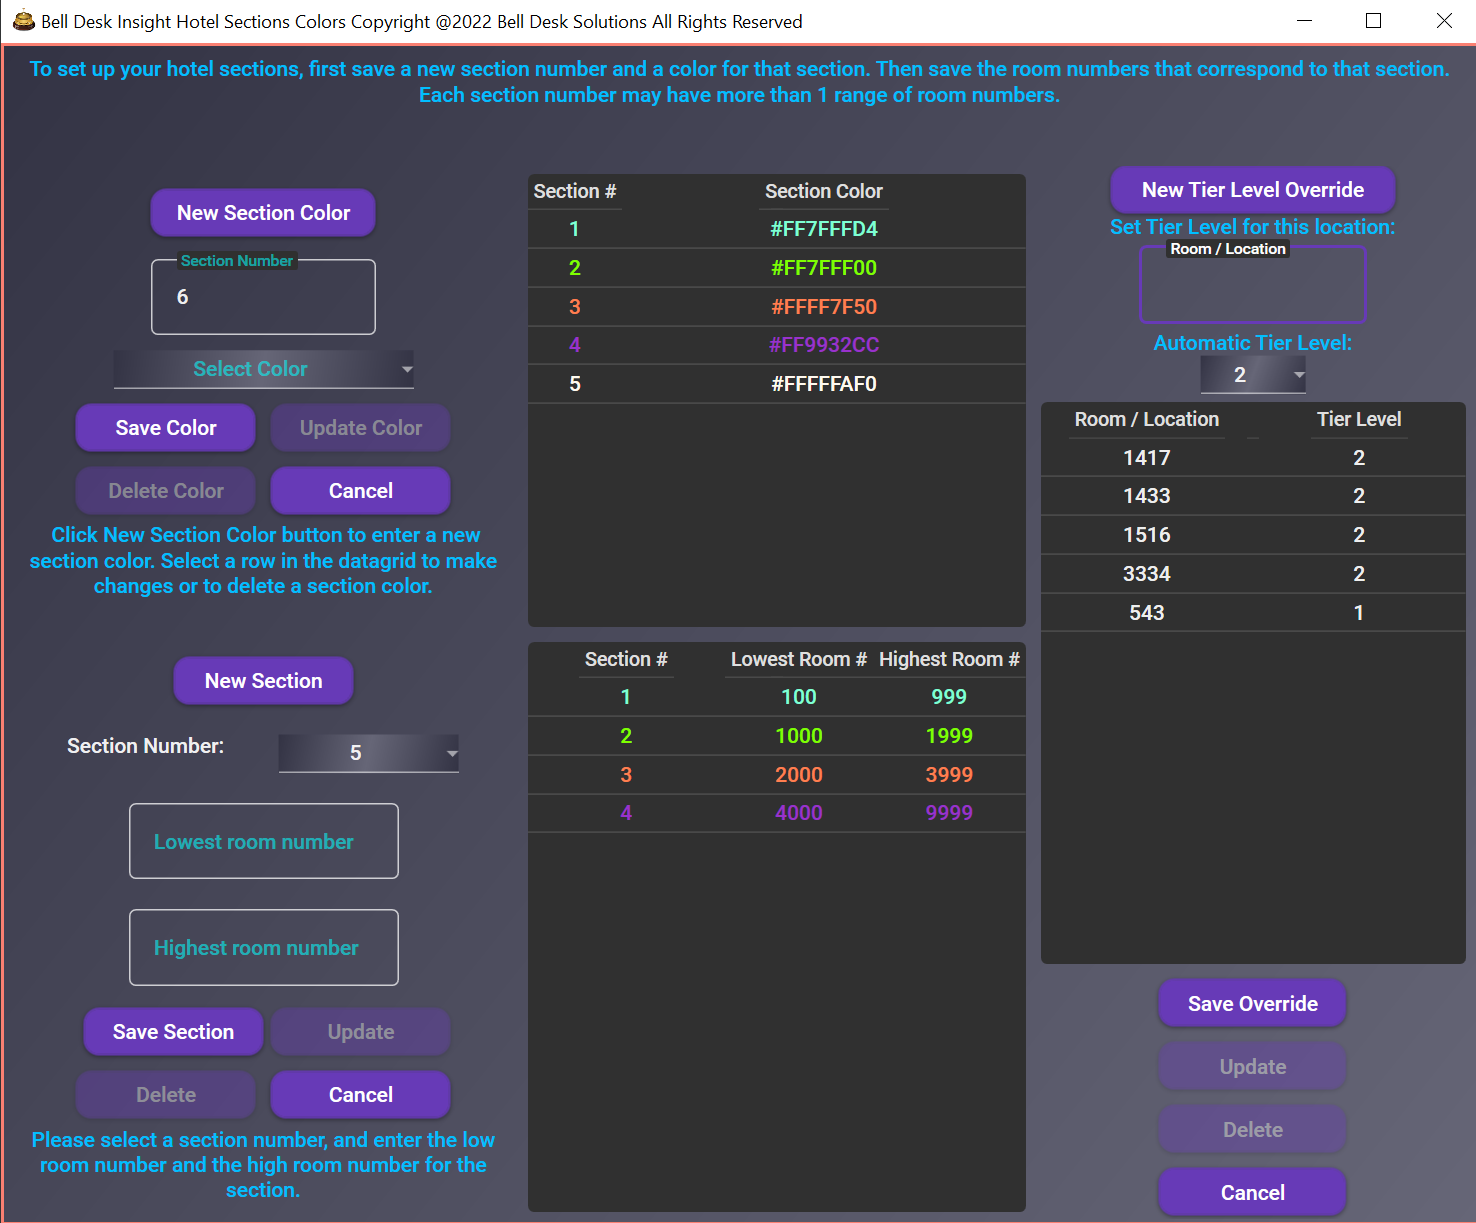
The hotel sections window is where you will create each section of your hotel. This is used when more than one front is assigned to a bell person to assign fronts in the same section of the hotel. It is also where you will choose the different colors for each section of the hotel.
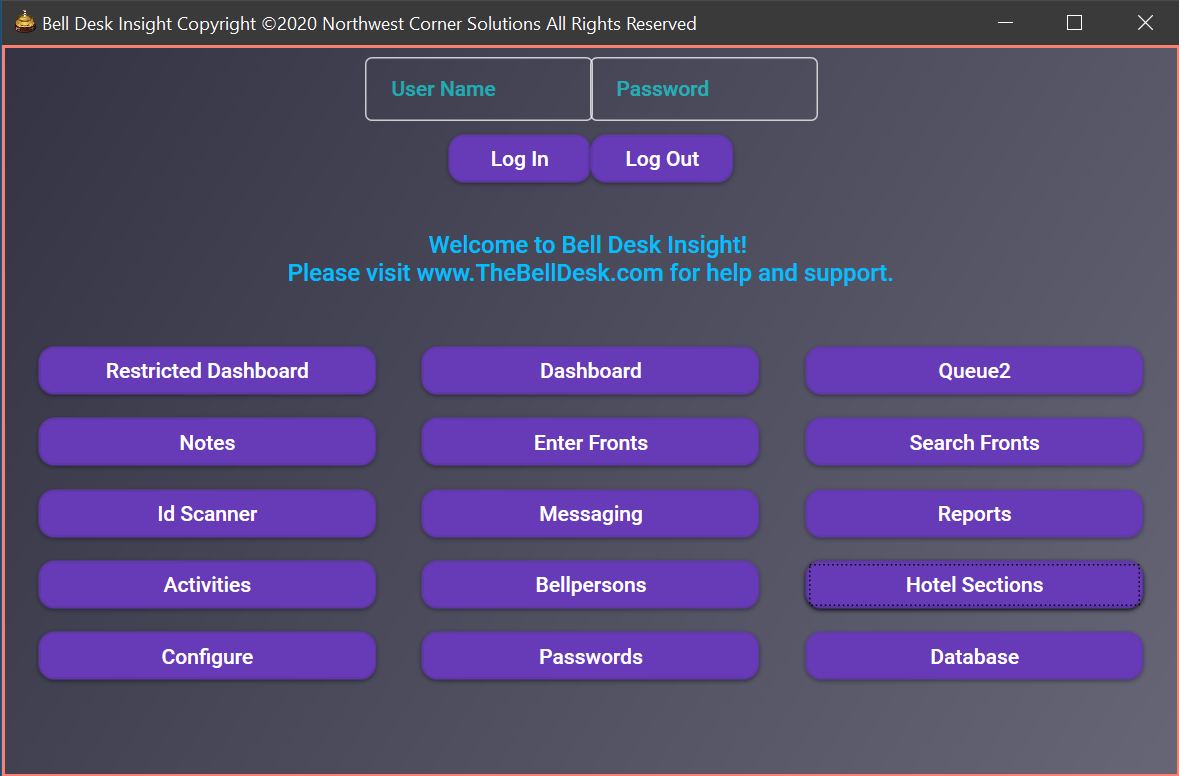
Where you first start Bell Desk Insight, this log in window will open. Enter your user name and your password and click Log In. If this is your first time using Bell Desk Insight, the default user name is admin and the default password is admin. The available windows will be determined by your user level. At the bottom of the log in window you will be able to change the override code used to assign fronts to a bell person out of order.
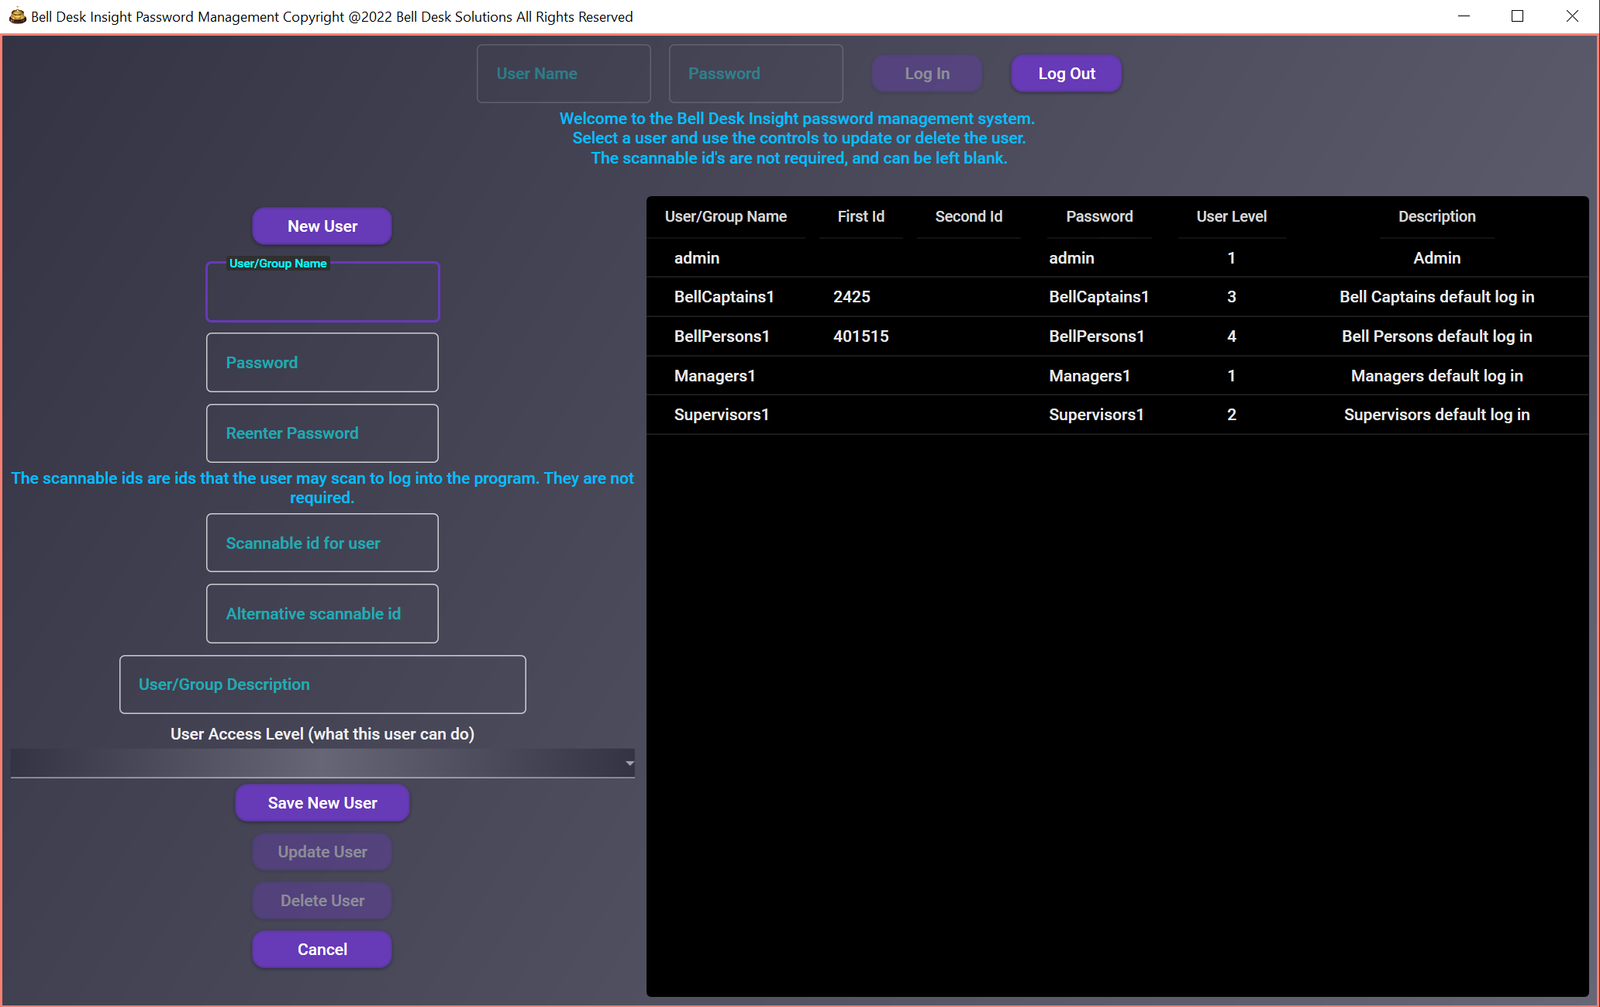
The default user name is admin. The default password is admin. You may use this combination to log in to the passwords window. User names and passwords can be created for individuals or for groups. The user levels will determine the level of access that each person or group will have to Bell Desk Insight. Each user name and password must be at least 6 characters, have at least 1 number, and include lower and upper case.
There must always be at least one user with a user level of 1. This guarantees that there will always be a user with complete access to the program, and all settings. I would use this level for department managers.
User level of 2 is the same as level 1, but there is no access to the database window. This can be used for supervisors or bell captains.
This user level was designed to be used by lower level supervisors and bell captains. These users will be able to access all functions necvessary for the day to day operations of the bell desk, but will not be able to make changes to the program.
This level only provides access where the user will be able to enter fronts, and will be able to scan for fronts or to be placed into the queue. This was designed for bell persons.
User level 5 is restricted to using only the version of the Dashboard where the bell person will only be able to scan in their id to be placed into the queue, or to scan for fronts when available. Designed to be used by bell persons.
This is the most restrictive user level for use by bell persons. They will only be able to scan in for fronts, and to be placed into the queue.
This user level was designed to be used by front desk agents to enter fronts into the system. This is the only access they will have.
With a user level of 8, the user will have access to all configuration settings for the program, but not to the features for the day tom day operations. This level was designed to be used by IT and support staff.
It is quite easy to add or make changes to your bell staff. To add a bell person, just click New Employee, enter the employees information, and save the employee. To make changes to an employee, select them in the data grid, make your changes, and update the employee. Bell persons cannot be deleted from the system. If a bell person is terminated, simply uncheck Currently Employed. The Is Assigned Fronts check box will allow you to assign fronts to this bell person by placing them in the bell persons combo box on the dashboard. The Checks Luggage check box is used on the Queue2 window and for the Ticket Board program. Please right click the video and open in a new tab to see it larger.
Activities are simply any thing that your bell staff will be doing throughout their day. Every time a bell person is assigned to an activity, a record is created containing the bell person, the activity, and the start and end times for the activity. The first three activites are already created, and cannot be deleted. This way, we are able to keep track of each bell person, and can surface key operational metrics that would otherwise remain hidden. When you ctreate your activities, there are 8 attributes that determine what happens when the bell person is assigned the activity:
When an activity has this attribute checked, the bell person will be placed in the queue datagrids on the Dashboard and/or the Queue2 windows.
This activity will place the bell person into the assignment datagrids on the Dashboard and/or Queue2 windows.
When used, this attribute will cause the bellperson to be placed into the datagrids located on the Dashboard. If this activity is a front or a last, the activity will be available in the front type combo box. Otherwise, it will become available when you right click a bell persons name.
Similar to the previous attribute, but now the bell person will be placed into the datagrid on the Queue2 window. You may use both of these together, or seperately.
This attribute will cause this activity to automatically be assigned to the first bell person in the queue.
This attribute will cause this activity to automatically be assigned to the last bell person in the queue.
Any activity with this atribute checked will cause the bell person to remain in the queue for fronts, but they will not be assigned a front. They will not lose their place in the queue, when they are placed back into the queue, they will keep their previous order.
This attribute will cause the activity to put in any end times for any activities the bell person is assigned to, and will remove them from any queue or assignment data grids the bell person is in.
This window is where you will set the various options for the Bell Desk Insight program. The first two options dictate how long before a bell person is removed from the queue when they have a front. You may add minutes if it is a last man job so that the bell person cannot wait til there are removed from the queue and another bell person is assigned the last man job. You may also change the number of minutes before an activity turns red in the assignments data grid. The refresh intervals dictate how often each installation of Bell Desk Insight will check the Azure database for updates. If you are using the Queue2 window, it can be run independatly from the main queue on the Dashboard window by unchecking the queue2 checkbox. The second set of options dictates what access the bell persons will have on their copy of Bell Desk Insight. Bell Desk Insight is designed so that there can be a seperate copy installed where the bell persons are stationed. Their copy of the Dashboard should be restricted to prevent mischief.
This window is where you will specify the different sections of your hotel. This is done for two purposes. The main reason is so that the Bell Desk Insight program can assign bell persons additional fronts that are in the same section of the hotel. Secondarily, it is used so that fronts in the same section of the hotel are color coded in the Dashboard window. To start, enter a section number, and select the color for fronts in that section of the hotel. Next, select the section you just created, enter the lowest and highest room numbers in that section, and save. The Tier Overrides section is used to automatically upgrade the tier level for any room number that is used for a front. For instance, if you have a suite number that should always be assigned first, enter the suite number and a tier level lower than 3. This way the suite will be given preference when fronts are assigned.
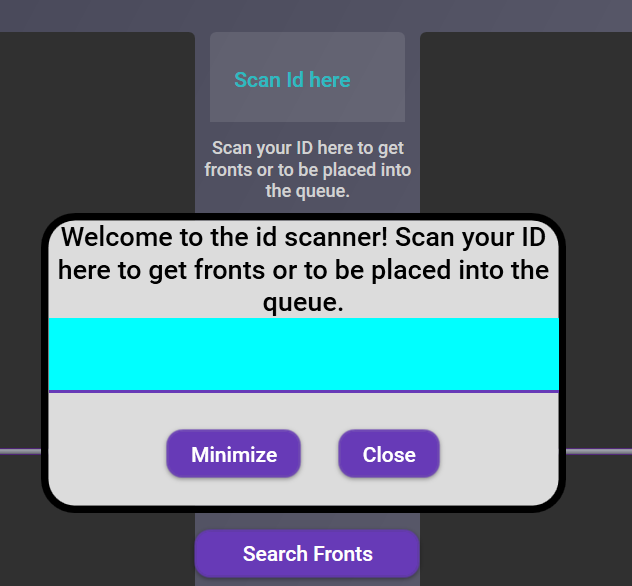
There are several ways for your bell staff to scan in their ids to be placed into the queue or to get fronts. The easiest for the bell captain and the bell staff, but the most complicated way for you, is to program your scanner to input as a prefix the caret character ^ (ASCII CODE 94), and a carriage return as a suffix. When your scanner is set up this way, you do not need to have any specific box or area focused for the program to accept the id. Any open Bell Desk Insight window that has a green border will accept the scanned in id. This includes the dashboard, the search fronts window, and the messaging windows. The main advantage of this method is that you can be using these windows normally when the id is scanned in. A second way is to have either the Id Scanner window open and focused, or to have the Dashboard window open with the Scan Id here box focused. The disadvantage with this method is that either of those two areas must have focus for the id to scan. You cannot be doing anything else when the id is scanned in.